

No products in the cart.
Multigrain Bread Loaf
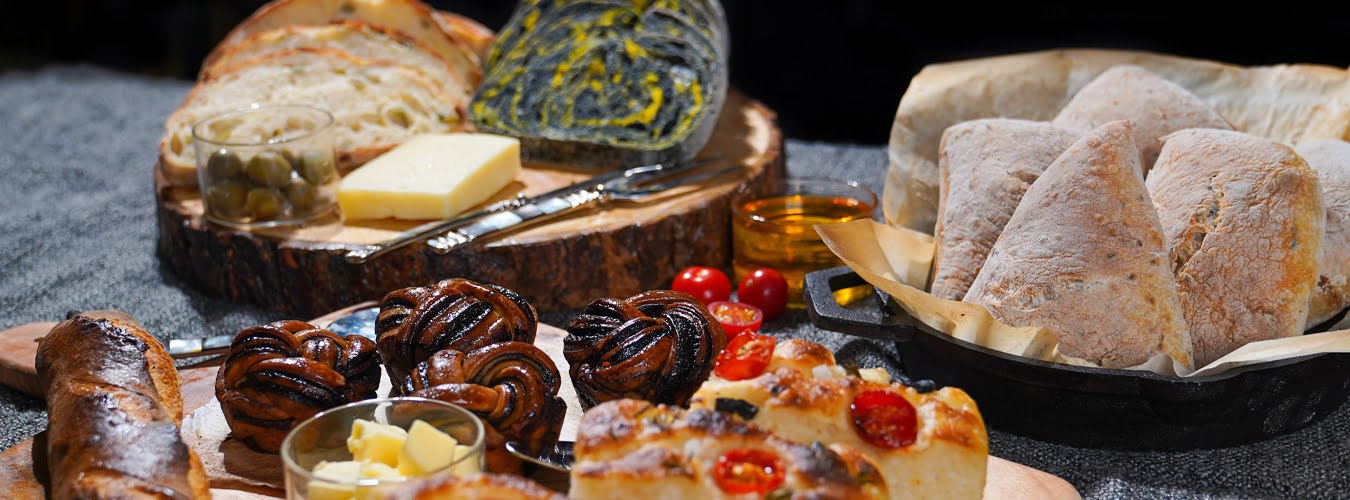
Who doesn’t love an amazing loaf of freshly baked bread and the fragrance of one baking in your home kitchen? Well, if you have not experienced it yet, you are missing a world of goodness. I have shared the video of the step by step process along with tons of tips and troubleshooting information. The recipe itself is fabulous because it’s nutritious, healthy and delicious – Multigrain Bread loaf!! This is a very special recipe since it is a celebratory session for us reaching the 20k followers milestone on our Facebook Page, 10k members in our Facebook group and of course the launch of our New Studio Kitchen and Meg’s Kitchen Logo. Thank you all for your support and this is my token of appreciation for all the love!!

250 g All Purpose Flour
90 g Whole Wheat Flour
90 g Powdered Oats
30 g Nachni/ Ragi Flour
30 g Soyabean Flour
30 g Milk Powder
2 tsp Salt
2 tsp Instant Yeast
2 tbsp Honey
4 tbsp Neutral Oil
250 ml Room Temp Water
WaterTo brush or spray the loaf
Mixed seeds and Oats For coating the bread
Melted Butter As needed to brush the loaf post baking
1
- In a bowl, add the all-purpose flour, whole wheat flour, soyabean flour, powdered oats, ragi flour and salt. Mix well.
- Now add in your instant yeast and mix again.
- Next add in the oil, honey and 250 ml of water ONLY. Reserve the remaining 25 ml of water.
- Bring it all together and form a rough dough.
- Once the dough comes together, in case it feels too dry you can add 1 tbsp more of the reserved water and begin kneading.
- Judge as you go along with 5- 8 minutes of kneading (watch the video for technique) if you need more water or if too sticky some dry flour or a little oil.
- Keep hands clean while kneading, sticky hands will make it more difficult to knead.
- Now form the dough into a smooth ball, tucking in the edges and then place it into a lightly oiled bowl with the seam side down.
- Cover the bowl with cling wrap and rest aside until it doubles in volume (no time limit).
- Once the dough has doubled, turn it upside down on your table top or a silicon baking mat.
- Punch out the air and extend the dough while gently pressing and flattening it, into a rough rectangular shape.
- Now roll the dough into a log shape (watch the video for reference) and tuck in the edges.
- Now spray or brush water on the crust or top of the bread and place the shaped bread into a plate filled with the mixed seeds. Cover the top of the bread completely with seeds.
- Place the bread into a 9 x 4 inch size lined tin, with the seam side down and the seeded side up.
- Place an oiled cling wrap on top of the tin and rest aside covered till it doubles in volume.
- Preheat the oven to 200 degrees.
- Remove the cling wrap and place the bread in the centre rack of the oven, with both rods on and the oven preheated.
- Bake for 40 minutes. In case your bread top browns too much, cover the top of the bread loosely with aluminium foil.
- Remove the bread and let it sit on a cooling rack for 5 minutes.
- Now check the edges using a blunt knife, making sure the bread is not stuck.
- Turn the bread over and place it with the top side up onto a cooling rack.
- Apply some melted butter of the crust and them cover with a kitchen towel and rest aside till completely cool.
- Slice and enjoy!
NOTES
2
- You can shape this recipe differently and make buns or hot dogs or boule or a batard with it.
- You can replace any flour you like with the same quantity other the all-purpose flour.
- Use instant yeast preferably.
- In case using dry active yeast, make sure to proof it. Watch video for more information.
- Water can be lukewarm or room temperature.
- Proofing times will vary depending on the weather conditions around you. Cooler the weather, the longer it takes to double.
- Shelf life is not long, 3-4 days.
- You can add butter instead of oil if you wish to.
- Watch the video for a lot more tips.
- You can slice the bread and cling wrap and store in the refrigerator.
- DO NOT slice the bread before it has completely cooled.
- In case you want to do a different shape, after the first proofing and before the second proofing, you can shape it as you like.
- Quantity of water used may vary depending on the quality of your flour.
Category30 Minute and more, Baking Recipes, Breads, Breakfast, Cooking Recipes, Diabetic Friendly, Healthy Recipes, Low Oil, Quick Easy Recipes, Refined Sugar FreeCuisineWorld Cuisine
Live Facebook Video: Multigrain Bread Loaf
Follow us on: Instagram
Ingredients
250 g All Purpose Flour
90 g Whole Wheat Flour
90 g Powdered Oats
30 g Nachni/ Ragi Flour
30 g Soyabean Flour
30 g Milk Powder
2 tsp Salt
2 tsp Instant Yeast
2 tbsp Honey
4 tbsp Neutral Oil
250 ml Room Temp Water
WaterTo brush or spray the loaf
Mixed seeds and Oats For coating the bread
Melted Butter As needed to brush the loaf post baking
Directions
1
- In a bowl, add the all-purpose flour, whole wheat flour, soyabean flour, powdered oats, ragi flour and salt. Mix well.
- Now add in your instant yeast and mix again.
- Next add in the oil, honey and 250 ml of water ONLY. Reserve the remaining 25 ml of water.
- Bring it all together and form a rough dough.
- Once the dough comes together, in case it feels too dry you can add 1 tbsp more of the reserved water and begin kneading.
- Judge as you go along with 5- 8 minutes of kneading (watch the video for technique) if you need more water or if too sticky some dry flour or a little oil.
- Keep hands clean while kneading, sticky hands will make it more difficult to knead.
- Now form the dough into a smooth ball, tucking in the edges and then place it into a lightly oiled bowl with the seam side down.
- Cover the bowl with cling wrap and rest aside until it doubles in volume (no time limit).
- Once the dough has doubled, turn it upside down on your table top or a silicon baking mat.
- Punch out the air and extend the dough while gently pressing and flattening it, into a rough rectangular shape.
- Now roll the dough into a log shape (watch the video for reference) and tuck in the edges.
- Now spray or brush water on the crust or top of the bread and place the shaped bread into a plate filled with the mixed seeds. Cover the top of the bread completely with seeds.
- Place the bread into a 9 x 4 inch size lined tin, with the seam side down and the seeded side up.
- Place an oiled cling wrap on top of the tin and rest aside covered till it doubles in volume.
- Preheat the oven to 200 degrees.
- Remove the cling wrap and place the bread in the centre rack of the oven, with both rods on and the oven preheated.
- Bake for 40 minutes. In case your bread top browns too much, cover the top of the bread loosely with aluminium foil.
- Remove the bread and let it sit on a cooling rack for 5 minutes.
- Now check the edges using a blunt knife, making sure the bread is not stuck.
- Turn the bread over and place it with the top side up onto a cooling rack.
- Apply some melted butter of the crust and them cover with a kitchen towel and rest aside till completely cool.
- Slice and enjoy!
NOTES
2
- You can shape this recipe differently and make buns or hot dogs or boule or a batard with it.
- You can replace any flour you like with the same quantity other the all-purpose flour.
- Use instant yeast preferably.
- In case using dry active yeast, make sure to proof it. Watch video for more information.
- Water can be lukewarm or room temperature.
- Proofing times will vary depending on the weather conditions around you. Cooler the weather, the longer it takes to double.
- Shelf life is not long, 3-4 days.
- You can add butter instead of oil if you wish to.
- Watch the video for a lot more tips.
- You can slice the bread and cling wrap and store in the refrigerator.
- DO NOT slice the bread before it has completely cooled.
- In case you want to do a different shape, after the first proofing and before the second proofing, you can shape it as you like.
- Quantity of water used may vary depending on the quality of your flour.


This was one of the first few things I tried from Meg’s cook along . I kept my expectations low as I am a beginner level baker & I was sceptical of handling multigrain dough.
But it’s Megha’s USP to keep recipes super simple & instructions do clear!
My bread turned out perfect in the 1st go. It has amazing earthy flavours and is very filling too.
My family loves it!
Thank you so much Megha!!
That is really sweet Dolly!! I am glad i can get you hooked onto bread making.. This is truly a delicious recipe. Keep baking! Enjoy.
Thanks Mega for the wonderful recipe. I am a house wife and completely didn’t know anything much about baking. I did try this recipe and it was just too good on the first go. Above all you always show us healthy recipes. My kids love to eat what i prepare from your recipes. Thanks a bunch.
Dear Sarita,
That is so wonderful to know.I am glad bread recipe turned out great for you and yes it is super yum and healthy too!!